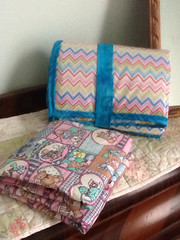
The two new mats
Well little Miss Layla thinks that when you are removing the dirty nappy and puting the new one underneath her, it is a good time to do a big wee. Lol
So as a consequence I got an SOS from Miss Le Coiffure that I needed to sew another change mat, so that there is always a clean one.
Also Miss Le Coiffure wanted a really thick one with the vinyl fabric on the back for her to put down onto public change tables.
the vinyl backed one
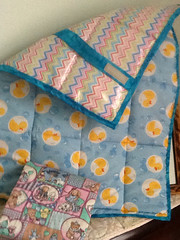
So Nana to the rescue, yesterday I made the one with fabric on both sides but I did use a piece of flannelette for the top half for the little head treader on, and this morning I wrestled with the very slippery vinyl fabric and created the other change mat.
Now these are very easy to make as they are basically 2 pieces of fabric sandwiched with batting in the middle that you quilt together then put binding on. These are best all sewn using a sewing machine as little Layla has shown they will be going through the washing machine quite often.
You don't even have to do free motion quilting. Just straight lines at different angles using a longer than normal stitch will suffice. This is what I did on yesterday mat and today's being so thick I sewed down the centre lengthwise then in the middle of the distance either side to divide the mat not roughly 4 equal lengths. Then I stitched in the middle width wise then halfway before the edge then near the edge to create a doona effect.
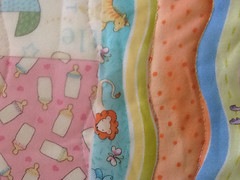
The free motion quilting on the first met
As I used 1cm (1/2") thick polyester batting it couldn't be quilted more closely , but what I have done is sufficient enough to create a soft and thick mat.
Note if you do use the vinyl fabric, it is called rain coating here in Australia at Spotlight. Have it facing down onto your sewing machine table with the cotton fabric facing upwards towards you. Also you will need to lengthen your stitch length, I made mine 3.5, and you will need to pull the mat through the machine a little to keep it moving.
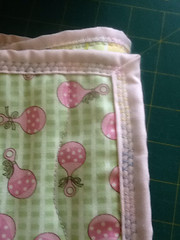
Now you can make these as fancy or as simple as you want. The first one I created the bulk of the top of the mat using leftover baby charm squares with a piece of flannelette at the top for the head to be laid. Then I free motion quilted it following the curves of the backing fabric.
The second mat with flannelette at the head.
As for size you can make them what ever size that suits you, the first one I made was quite wide and I made it so it would roll up then be secured using a strap with Velcro attached, it actually is to wide to sit in the nappy bag. So yesterday's one I made narrower and attached velcro so it could be folded into a little square much easier to fit into the nappy bag.
The fat vinyl one I also folded into a square and put on a strap to secure it with Velcro.
The basic measurement I used was the top 22" x 36" (56cm x 92cm) with the backing and batting 25" x 38" (65cm x 98cm). For the binding I measured the total edge add 12" (30cm) and cut it at 2 1/2" (7cm) wide.
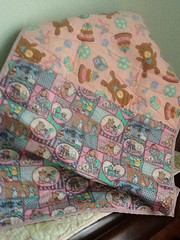
I used a wavy stitch which I lengthened when I sewed the binding down after I had folded it over.
Fancy stitching on the first mat.
For the binding on the vinyl backed mat I sewed it onto the top side, then cut of the excess making sure I trimmed the batting away quite close to the stitching line so to have less bulk in the binding, then folded it over and sewed it down.
No comments:
Post a Comment